InteractLabeler 1.2.1
|
 |
|
 |
|
 |
|
 |
|
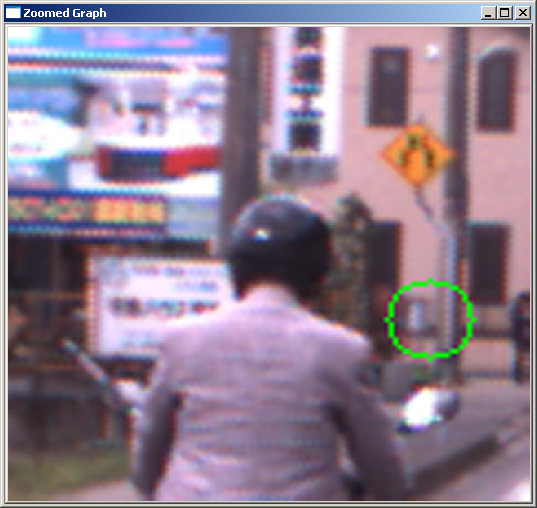
| window 1: original image | |
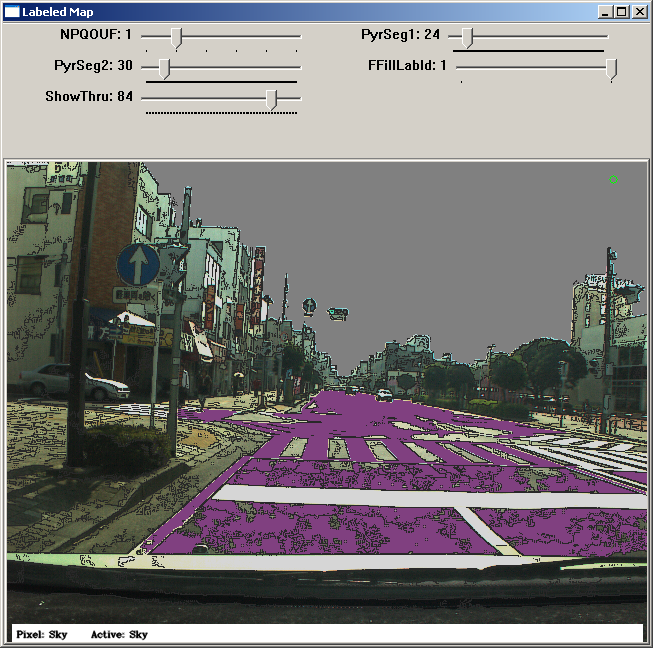
window 2: map of edges + labeled regions + segmentation controls | |
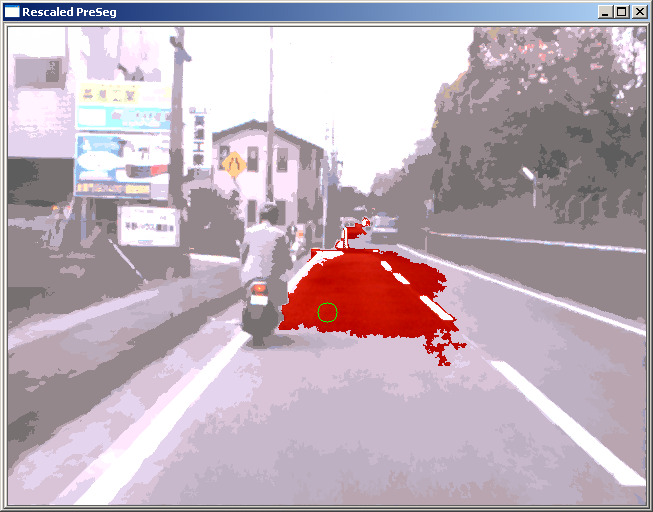
window 3: segmented image + currently focused region | |
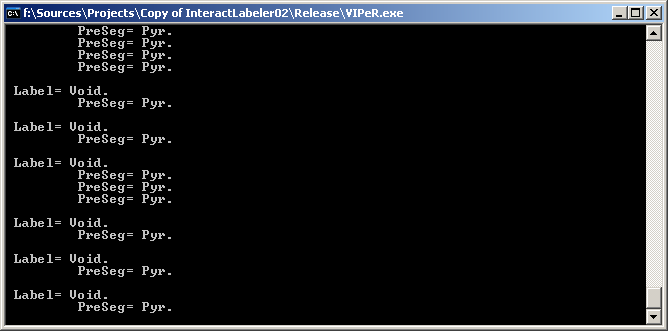
window 4: console (information display) | |
Pressing the SHIFT key while moving the mouse will display the list of labels in windows 1 and 3 (see figure)
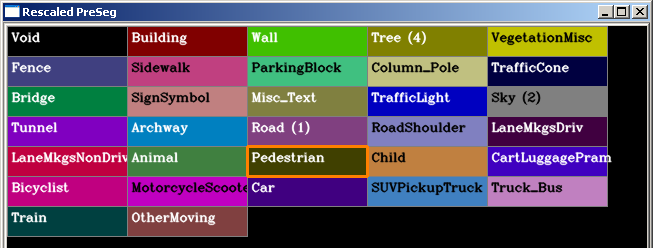 |
|
| window 1 and 3: label list | |
In window 2, a text box displays the current labels: the first "Pixel" label refers to the label of the pixel pointed by the mouse, while the "Active" label refers to the label currently in use to label regions.
3. ANNOTATION
3.1 Running the segmentation
When viewing a frame, pressing the "CTRL r" will run the 5 region segmentation algorithms.Automatic segmentation provides a natural initial step to achieve region grouping and labelling. An automatic segmentation groups pixels which have similar color and texture properties. Since they do not always correspond to "objects" (e.g. a car is a composite of visually different regions), the user can then manually group those regions into semantic ones and then label them.
InteractLabeler uses 3 different segmentation algorithms to give the user more choices in the regions to group (MeanShift [1], Felzenszwalb & Huttenlocher [2], Pyramids [3]). Note that the MeanShift algorithm has 3 modes (from fine to coarse: Quantisation (Q), Oversegmentation (O), Undersegmentation(U)). There is also a manual grouping mode (N). The choice between the various segmentations should be made by visual inspection, depending on the object to label. For example, some algorithms produce more (e.g. mode (Q)) or less regions (e.g. mode (U)). The manual mode can be used to refine the grouping of difficult regions.
By sliding the "N,P,Q,O,U,F" sliderbar, one can switch between the 6 segmentation modes graded from left to right:
| grouping mode | description | |
| NULL (N) | manual painting | |
| Pyramid (P) | pyramid segmentation | |
| Quantisation (Q) | Mean shift segmentation in "quantisation" mode | |
| Oversegmentation (O) | Mean shift segmentation in "oversegmentation" mode | |
| Undersegmentation (U) | Mean shift segmentation in "undersegmentation" mode | |
| Felzenszwalb (F) | Felzenszwalb & Huttenlocher segmentation |
The sliders "PyrSeg1" and "PyrSeg2" are the parameters of Pyramid segmentation. "PyrSeg1" is the error threshold for establishing the links, and "PyrSeg2" is the error threshold for the segments clustering.
The result of the segmentation is always shown in window 3.
3.2 Annotating regions
To annotate a region, first, a label must be chosen from the label list. This list is displayed as long as the SHIFT key is pressed. When releasing the key, the selected label will be the last one focused by the mouse. In window 2, when the mouse hovers over a region, the same region is highlighted in red on the segmented image in window 3. Alternatively, a label can be easily selected by using its corresponding shortcut (shown as a symbol in parentheses in the label list). These shortcuts can be modified in file "LabelNames02.txt". Finally, the third way to pick a label is the following: when right-clicking over a region in window 2, its label becomes the current label. Note that right-click has a different effect in the zoom window: it pans the zoomed image.To apply the current label to the current region, simply press the left mouse button. To expand the label over multiple contiguous regions, drag the mouse over the regions. The resulting labeled regions will be shown in window 2 as regions color-filled with the corresponding label color.
More precisely, the behaviour of the mouse click is the following: the mouse cursor is composed of a green circle, the "paintbrush". When clicking the mouse, actually all regions that intersect with the green circle will be labeled. This allows to speed up the grouping process. The diameter of the paintbrush can be ajusted by using the mousewheel, depending on the required granularity.
The effect of the flood-filling can be adjusted using the "FFillLabeld" slider control (top of window 2) which takes values 0 or 1. When 0, then the filling will not be propagated over labeled regions. When 1, then it will. Both behaviours are desirable: when you want to change the label of a big region, then you'd want to flood-fill it; when you are manually refining holes of a labeled region, then you don't to flood-fill it.
When working in the labeled image window, you can overlay the original image to see which pixel you are painting. You can adjust the opacity of the original image by moving the slider "ShowThru".
When in manual mode (N), the paintbrush can be used to freely draw regions without the help of segmented regions. The paintbrush diameter is still adjustable with the mousewheel.
See 4. SHORTKEYS for the list of available shortcuts while using strokes to group regions.
When painting regions, you will find convenient to zoom in and out the original image in window 1, to achieve a precise labeling of small or difficult objects. This is achieved by scrolling up and down the mousewheel. You may want to maximise this window to see more of the zoomed region. Then you can pan the zoomed image using the right-click button.
4. SHORTKEYS
| ESC | quit the program | ||
| zooming | mousewheel | zooms in and out | |
| right-click (in zoom window) | pans the zoomed image | ||
| grouping/annotating | right-click (in other windows) | picks the label of the focused region | |
| CTRL r | run segmentations on current frame | ||
| CTRL s | commit changes and save current labeled frame | ||
| SHIFT | switch to label list display | ||
| CTRL z | undo action | ||
| CTRL y | redo action | ||
| CTRL d | clear strokes in current frame | ||
| CTRL mousewheel | changes the paintbrush diameter | ||
| [user-defined letter a-z or digit 0-9] | picks the corresponding label from the list | ||
| , | display previous segmentation | ||
| . | display next segmentation | ||
| video navigation | [SPACE] | go one frame forward | |
| [BACKSPACE] | go one frame backwards | ||
| + | go 50* frames forward (implicitly also saves, like "c") | ||
| - | go 50* frames backwards (implicitly also saves, like "c") | ||
| \ | jump to first frame | ||
| / | jump to last frame | ||
| CTRL j | jump to a specific frame (console input) | ||
5. LOGGING STROKES
We have now enabled the logging of the user strokes when performing the grouping and labelling of regions. This information will help us investigate in the future how a human performs region grouping and labeling to hopefully improve our automatic segmentation and recognition algorithm.This information is stored in a text file (see field "LABELED_IMAGE_NAMING" in this section to find out about its folder and filename). The following information are stored: number of strokes on the frame, paintbrush radius, number of points, segmentation algorithm parameters, absolute time stamp of the stroke start, (x, y) of each mouse location in stroke, miliseconds to complete stroke.
Note that no personal information is stored and that this feature does not affect the user's labeling task. However, this feature can simply be disabled in the metafile by commenting the line containing the string "LOG_INTERACTIONS".
6. REFERENCES
| [1] | D. Comaniciu, P. Meer, "Robust Analysis of Feature Spaces: Color Image Segmentation", IEEE Conf. Computer Vision and Pattern Recognition (CVPR'97), San Juan, Puerto Rico, 750-755, 1997 |
| [2] | P. F. Felzenszwalb and D. P. Huttenlocher, "Efficient Graph-Based Image Segmentation", International Journal of Computer Vision, Volume 59, Number 2, September 2004. |
| [3] | OpenCV library. |
7. DOWNLOAD
Click here to download the zip file which contains: the program binary, the dynamic libraries, the meta files, and this documentation.All the files and folders contained in this archive just have to be copied as they are into a new directory. And the program must be run from there.
[27.02.2006]